> ## Documentation Index
> Fetch the complete documentation index at: https://docs.apimart.ai/llms.txt
> Use this file to discover all available pages before exploring further.
# 빠른 시작
> API 서비스를 빠르게 시작하세요
# 빠른 시작
API 서비스에 오신 것을 환영합니다! 이 가이드는 이미지 및 비디오 생성을 빠르게 시작하는 데 도움을 드립니다.
## 1단계: API 키 받기
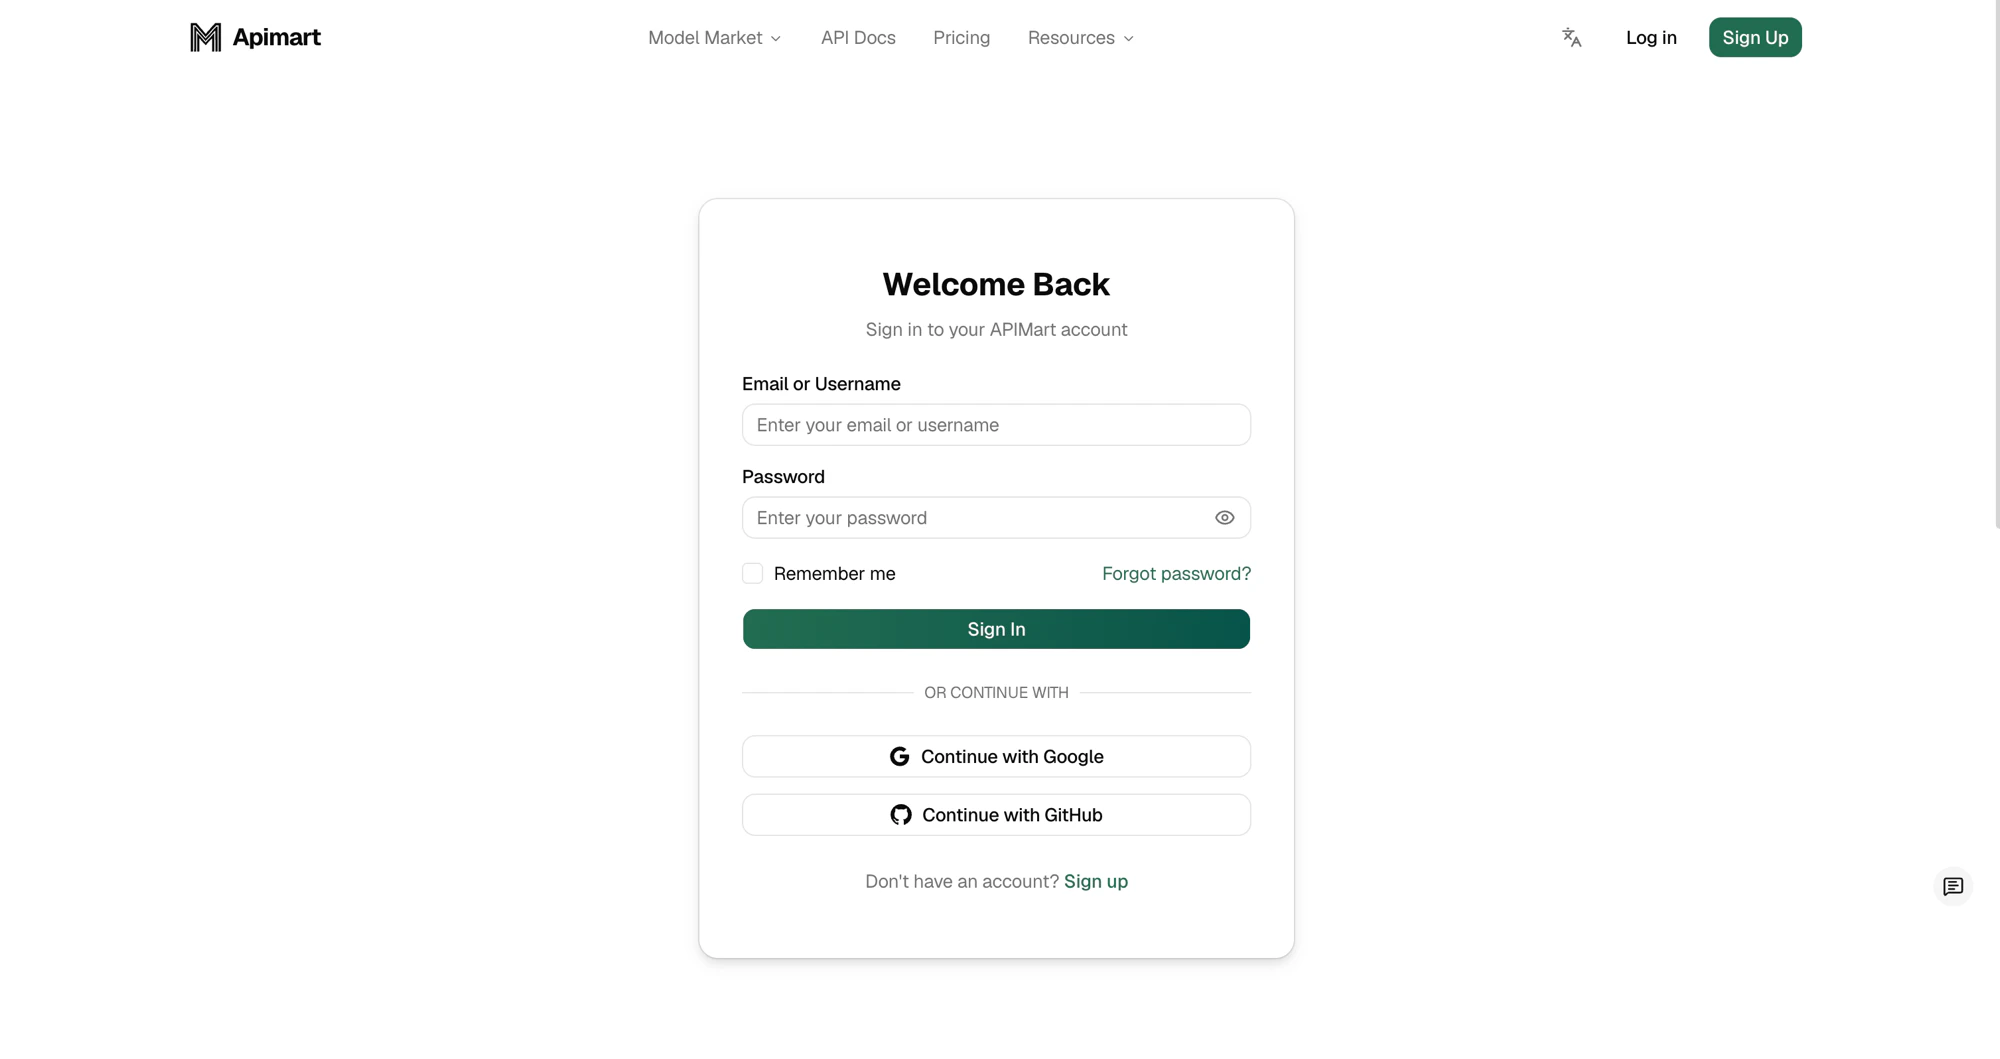
1. [API 키 관리 페이지](https://apimart.ai/keys) 방문
2. 계정에 로그인
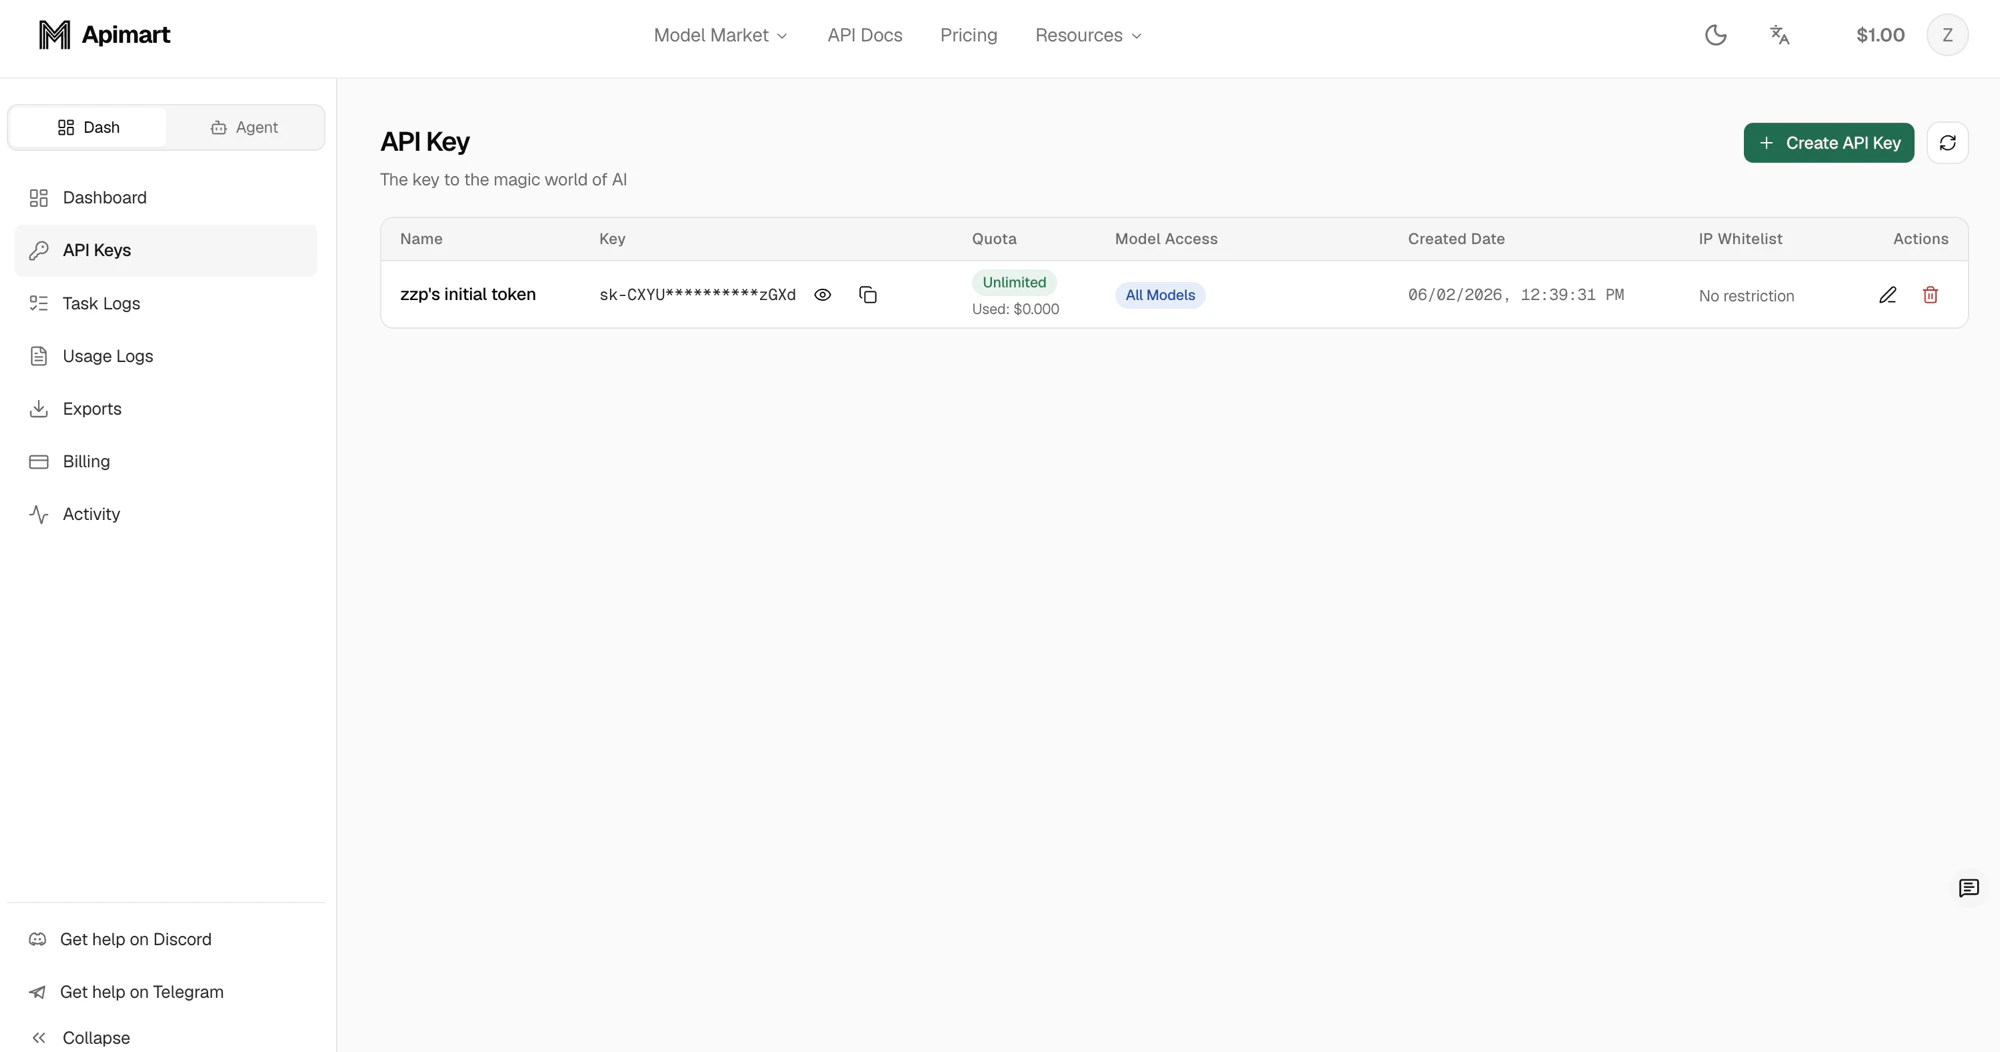
 3. 새 API 키 생성
API 키 페이지에서 오른쪽 상단의 **Create API Key** 버튼을 클릭하여 생성합니다.
3. 새 API 키 생성
API 키 페이지에서 오른쪽 상단의 **Create API Key** 버튼을 클릭하여 생성합니다.
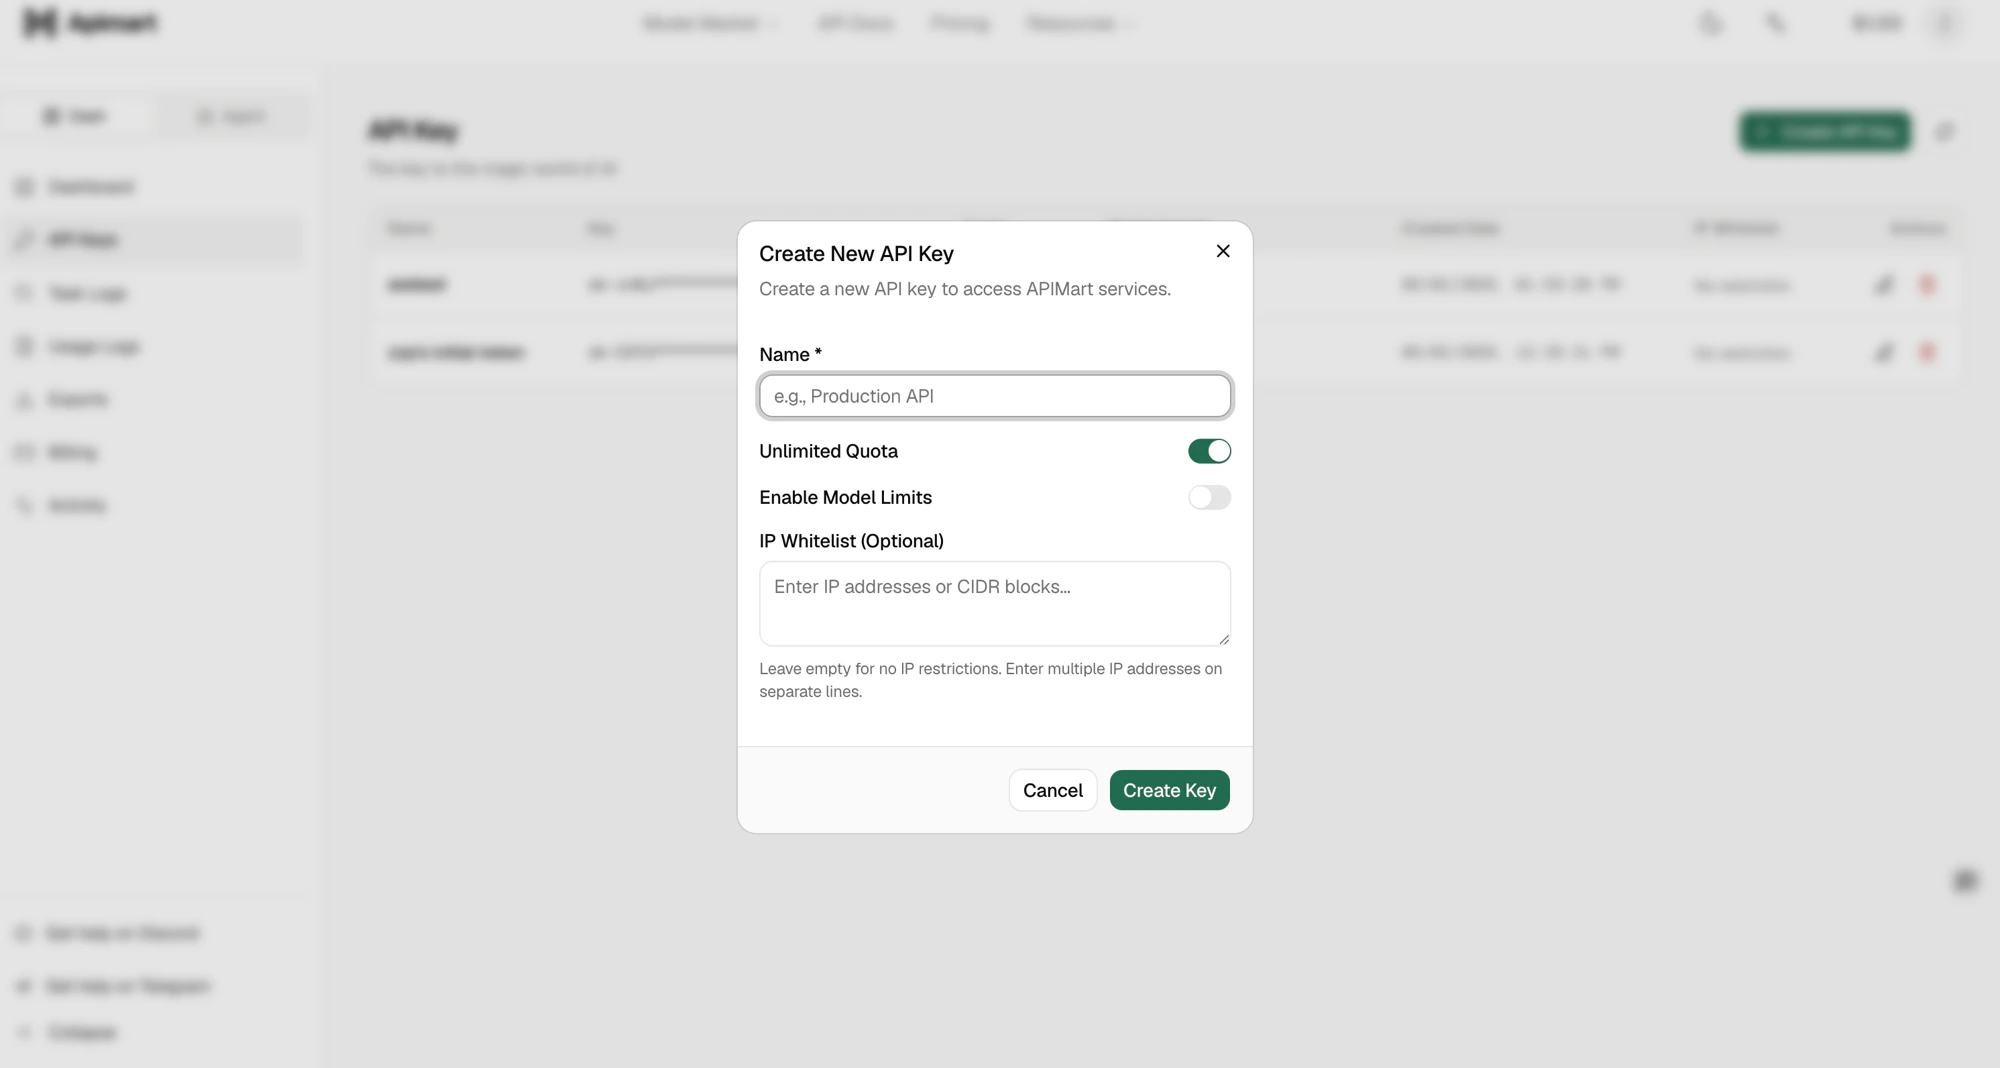
 표시된 폼에서 키의 **Name** 을 입력하고, 필요에 따라 할당량(Unlimited Quota), 모델 제한(Enable Model Limits), IP 화이트리스트를 설정한 뒤 **Create Key** 를 클릭합니다.
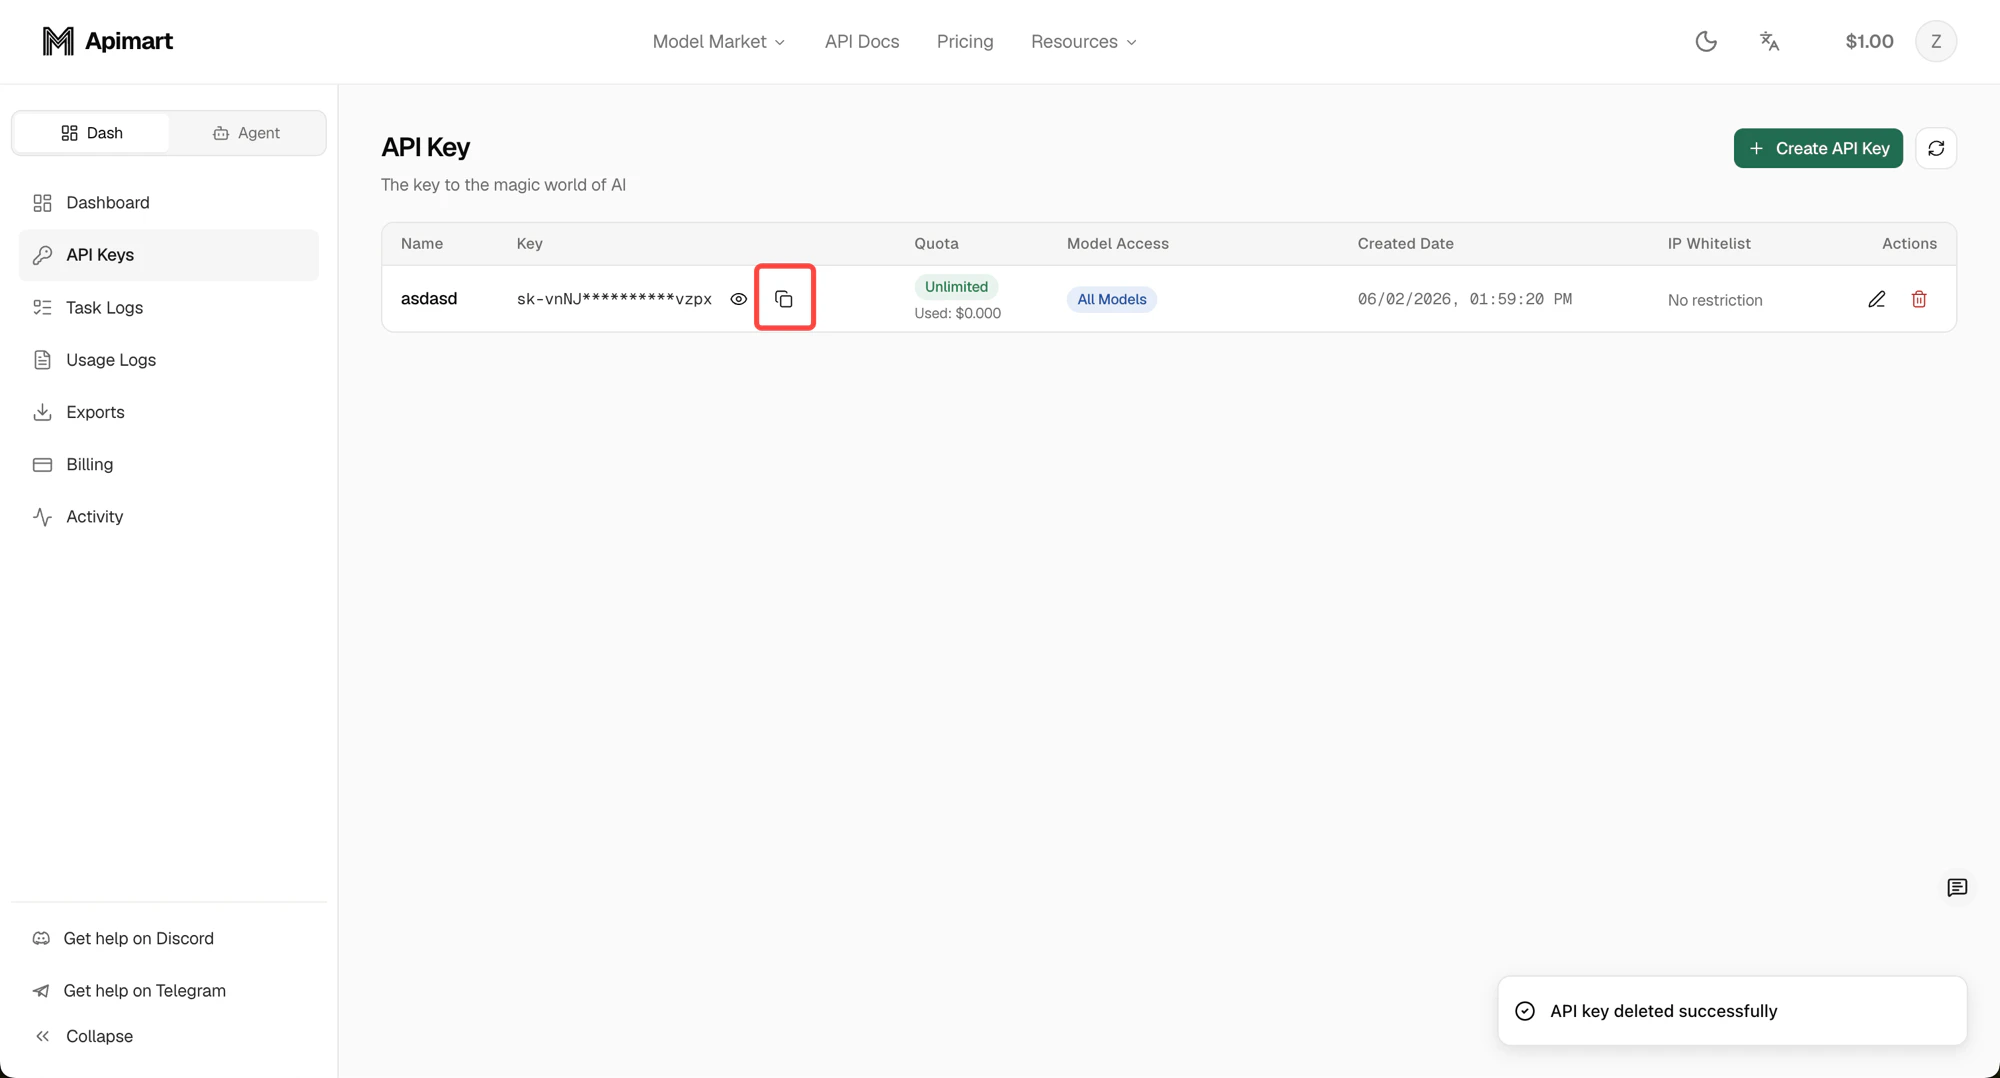
 4. 키를 안전하게 보관
 ## 2단계: 모델 선택
다양한 AI 모델 중에서 선택할 수 있습니다. [모델 마켓](https://apimart.ai/ko/model)에서 사용 가능한 모든 모델과 가격을 확인할 수 있습니다.
### 텍스트 생성 모델
* **GPT-4o**: 강력한 대화 및 텍스트 생성 기능
* **Claude**: Anthropic의 고성능 대화 모델
* **Gemini**: Google의 멀티모달 대규모 언어 모델
### 이미지 생성 모델
* **GPT-4o-image**: 고품질 이미지 생성
### 비디오 생성 모델
* **Sora2**: 전문 비디오 생성
## 3단계: 요청 보내기
### 텍스트 생성 예제
```bash theme={null}
curl -X POST https://api.apimart.ai/v1/chat/completions \
-H "Authorization: Bearer YOUR_API_KEY" \
-H "Content-Type: application/json" \
-d '{
"model": "gpt-4o",
"messages": [
{
"role": "user",
"content": "안녕하세요, 자기소개를 해주세요"
}
]
}'
```
### 이미지 생성 예제
```bash theme={null}
curl -X POST https://api.apimart.ai/v1/images/generations \
-H "Authorization: Bearer YOUR_API_KEY" \
-H "Content-Type: application/json" \
-d '{
"model": "gpt-4o-image",
"prompt": "A cute panda",
"size": "1:1",
"n": 1
}'
```
### 비디오 생성 예제
```bash theme={null}
curl -X POST https://api.apimart.ai/v1/videos/generations \
-H "Authorization: Bearer YOUR_API_KEY" \
-H "Content-Type: application/json" \
-d '{
"model": "sora-2",
"prompt": "Waves crashing against the shore",
"duration": 15,
"aspect_ratio": "16:9"
}'
```
## 4단계: 작업 상태 확인
비동기 처리를 사용하므로 결과를 얻으려면 작업 상태를 조회해야 합니다.
```bash theme={null}
curl -X GET https://api.apimart.ai/v1/tasks/YOUR_TASK_ID \
-H "Authorization: Bearer YOUR_API_KEY"
```
## 다음 단계
사용 가능한 모든 API 엔드포인트에 대해 자세히 알아보세요.
API를 애플리케이션에 통합하는 방법을 배워보세요.
## 2단계: 모델 선택
다양한 AI 모델 중에서 선택할 수 있습니다. [모델 마켓](https://apimart.ai/ko/model)에서 사용 가능한 모든 모델과 가격을 확인할 수 있습니다.
### 텍스트 생성 모델
* **GPT-4o**: 강력한 대화 및 텍스트 생성 기능
* **Claude**: Anthropic의 고성능 대화 모델
* **Gemini**: Google의 멀티모달 대규모 언어 모델
### 이미지 생성 모델
* **GPT-4o-image**: 고품질 이미지 생성
### 비디오 생성 모델
* **Sora2**: 전문 비디오 생성
## 3단계: 요청 보내기
### 텍스트 생성 예제
```bash theme={null}
curl -X POST https://api.apimart.ai/v1/chat/completions \
-H "Authorization: Bearer YOUR_API_KEY" \
-H "Content-Type: application/json" \
-d '{
"model": "gpt-4o",
"messages": [
{
"role": "user",
"content": "안녕하세요, 자기소개를 해주세요"
}
]
}'
```
### 이미지 생성 예제
```bash theme={null}
curl -X POST https://api.apimart.ai/v1/images/generations \
-H "Authorization: Bearer YOUR_API_KEY" \
-H "Content-Type: application/json" \
-d '{
"model": "gpt-4o-image",
"prompt": "A cute panda",
"size": "1:1",
"n": 1
}'
```
### 비디오 생성 예제
```bash theme={null}
curl -X POST https://api.apimart.ai/v1/videos/generations \
-H "Authorization: Bearer YOUR_API_KEY" \
-H "Content-Type: application/json" \
-d '{
"model": "sora-2",
"prompt": "Waves crashing against the shore",
"duration": 15,
"aspect_ratio": "16:9"
}'
```
## 4단계: 작업 상태 확인
비동기 처리를 사용하므로 결과를 얻으려면 작업 상태를 조회해야 합니다.
```bash theme={null}
curl -X GET https://api.apimart.ai/v1/tasks/YOUR_TASK_ID \
-H "Authorization: Bearer YOUR_API_KEY"
```
## 다음 단계
사용 가능한 모든 API 엔드포인트에 대해 자세히 알아보세요.
API를 애플리케이션에 통합하는 방법을 배워보세요.