Introduction
This tutorial guides you through creating and configuring a Feishu bot in OpenClaw Manager. Once complete, your Feishu Bot will be powered by APIMart’s AI models for intelligent conversations within Feishu.Prerequisites: Please ensure you have completed the OpenClaw Manager deployment and the Manager is running with the management UI accessible.
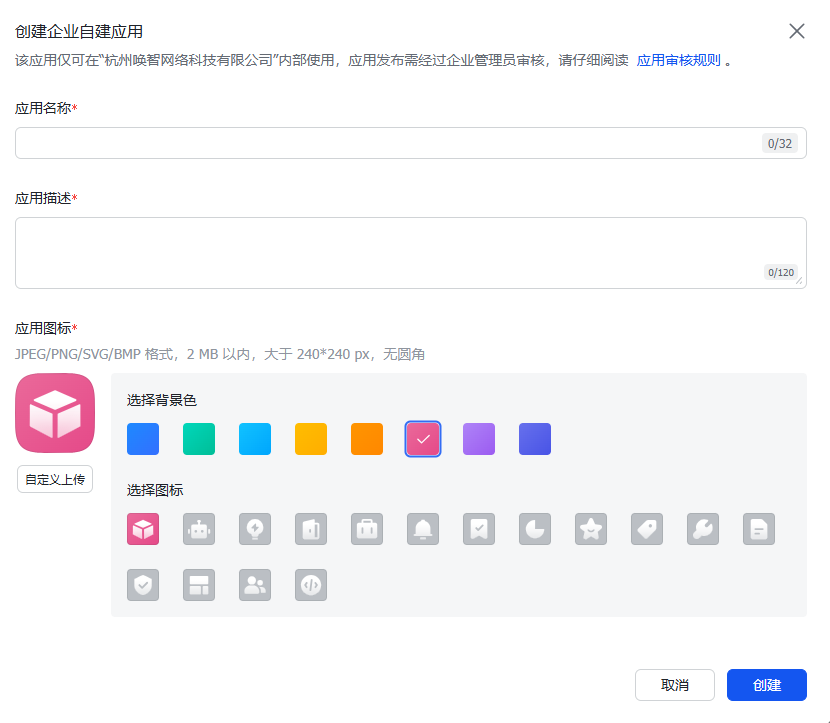
Step 1: Create a Feishu Enterprise App
- Go to Feishu Open Platform, log in and click Create Custom App

- Fill in the app name and description, upload an app icon
Step 2: Configure App Permissions
- Enter the app details page, click Permission Management in the left menu
- Click Batch Enable, paste the following JSON configuration:
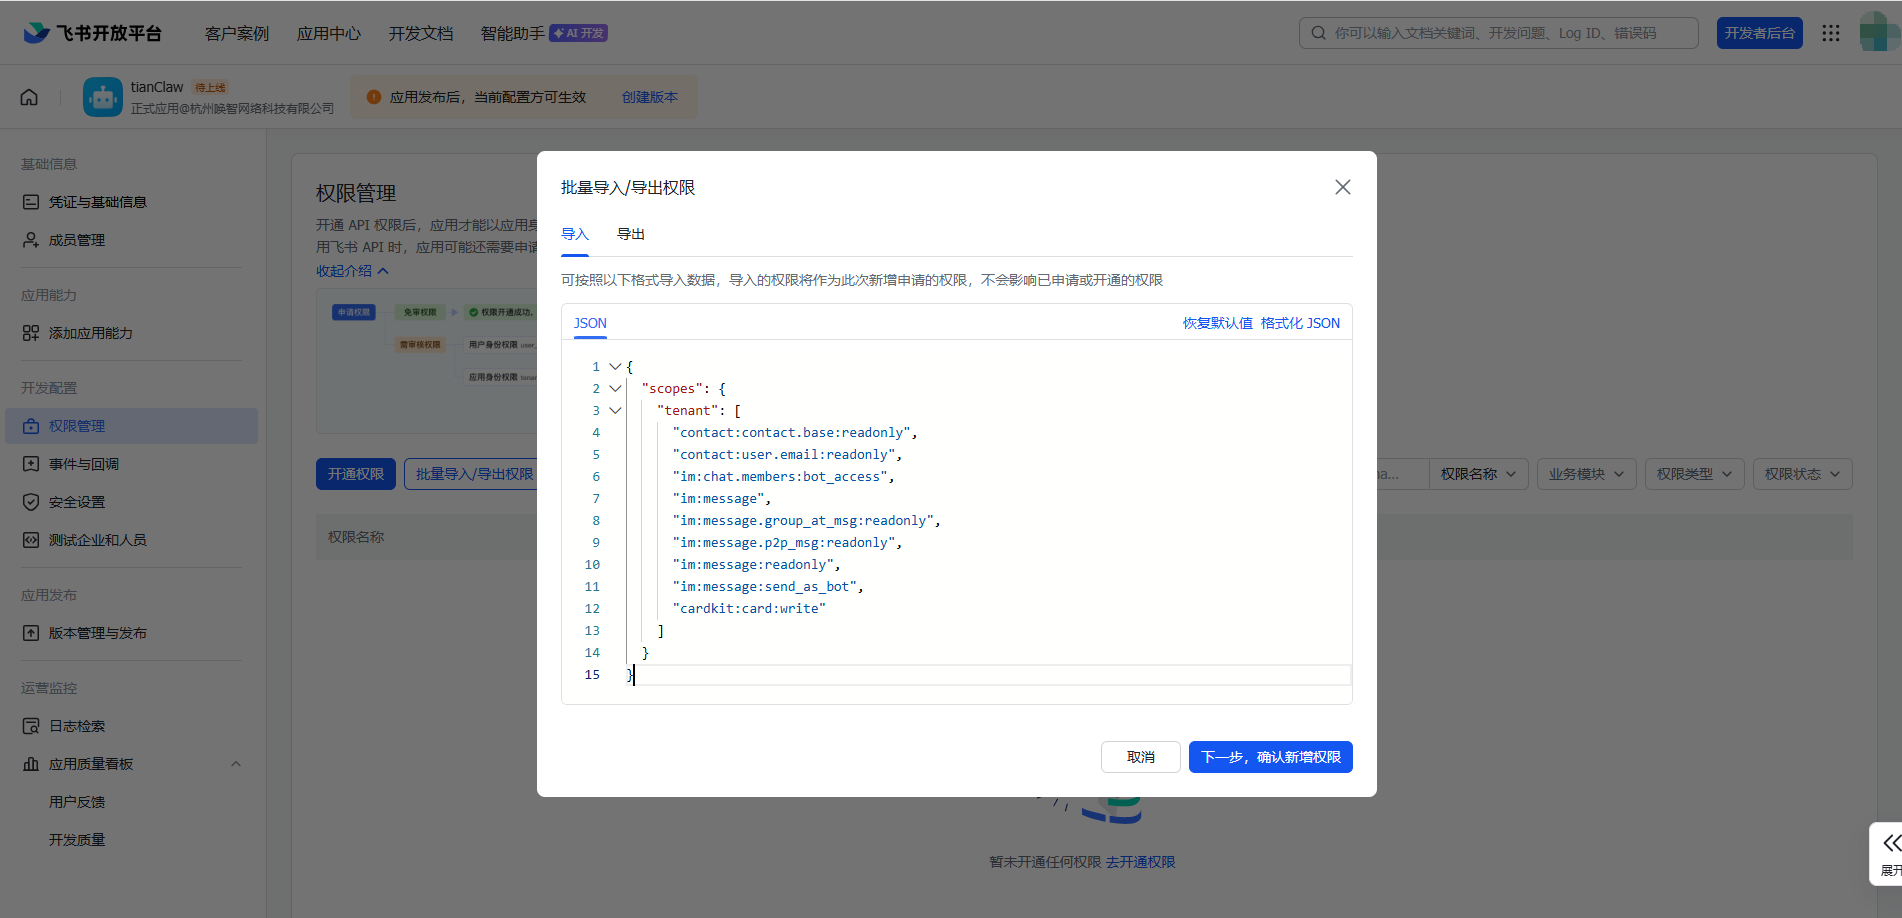
- Click to confirm
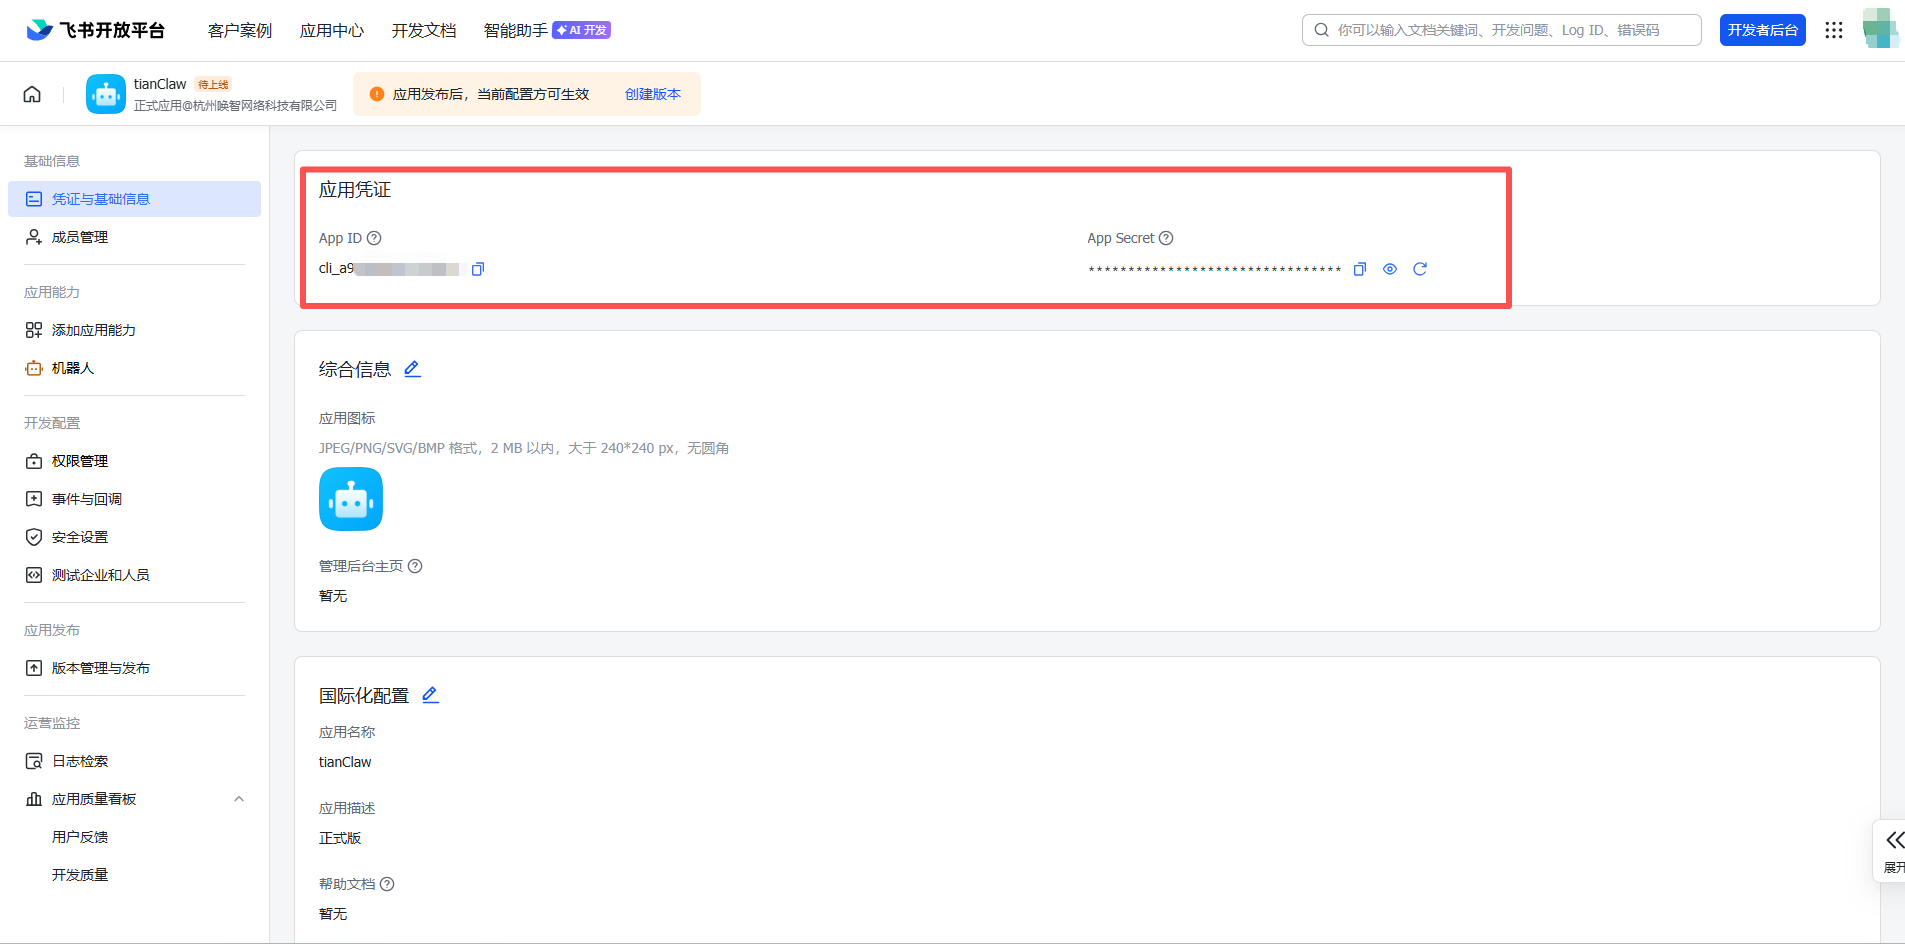
Step 3: Get Credentials
- Click Credentials & Basic Info in the left menu
-
Copy the App ID (format:
cli_xxxxxxxxxx) and App Secret
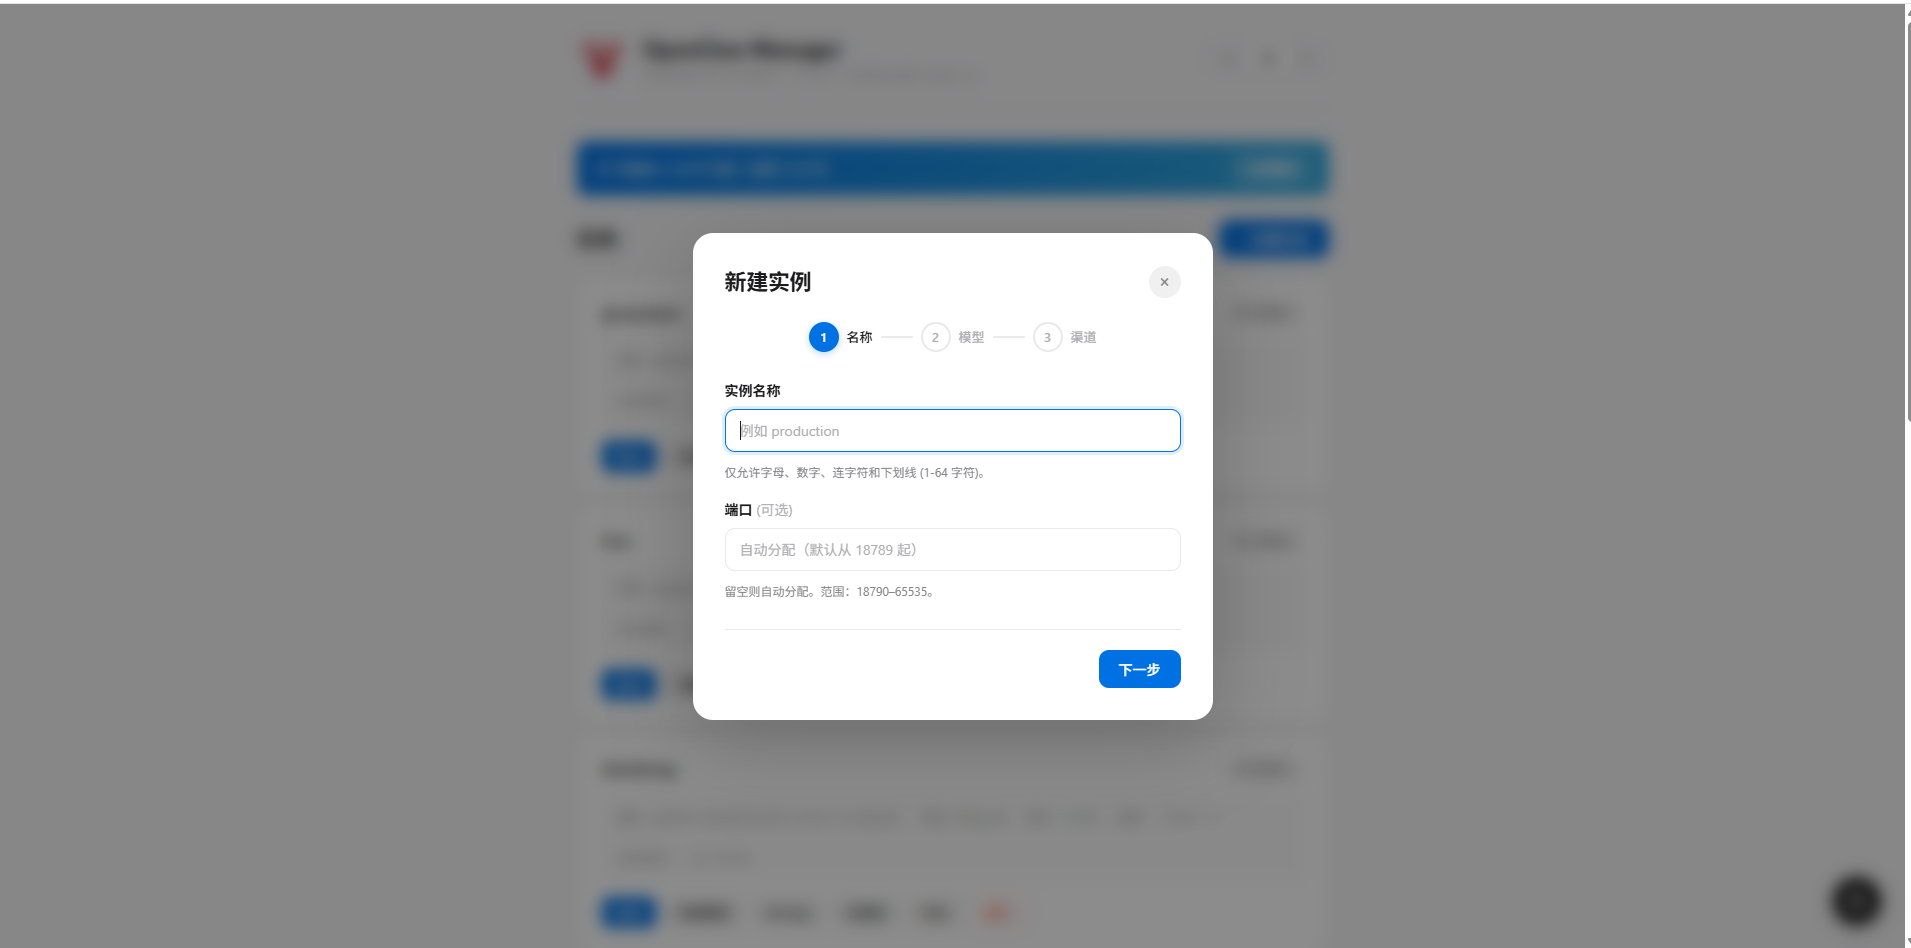
Step 4: Create Instance in Manager
-
Open the OpenClaw Manager UI (
http://127.0.0.1:51942) - Click + New Instance
-
Enter instance name — e.g.
my-feishu-bot
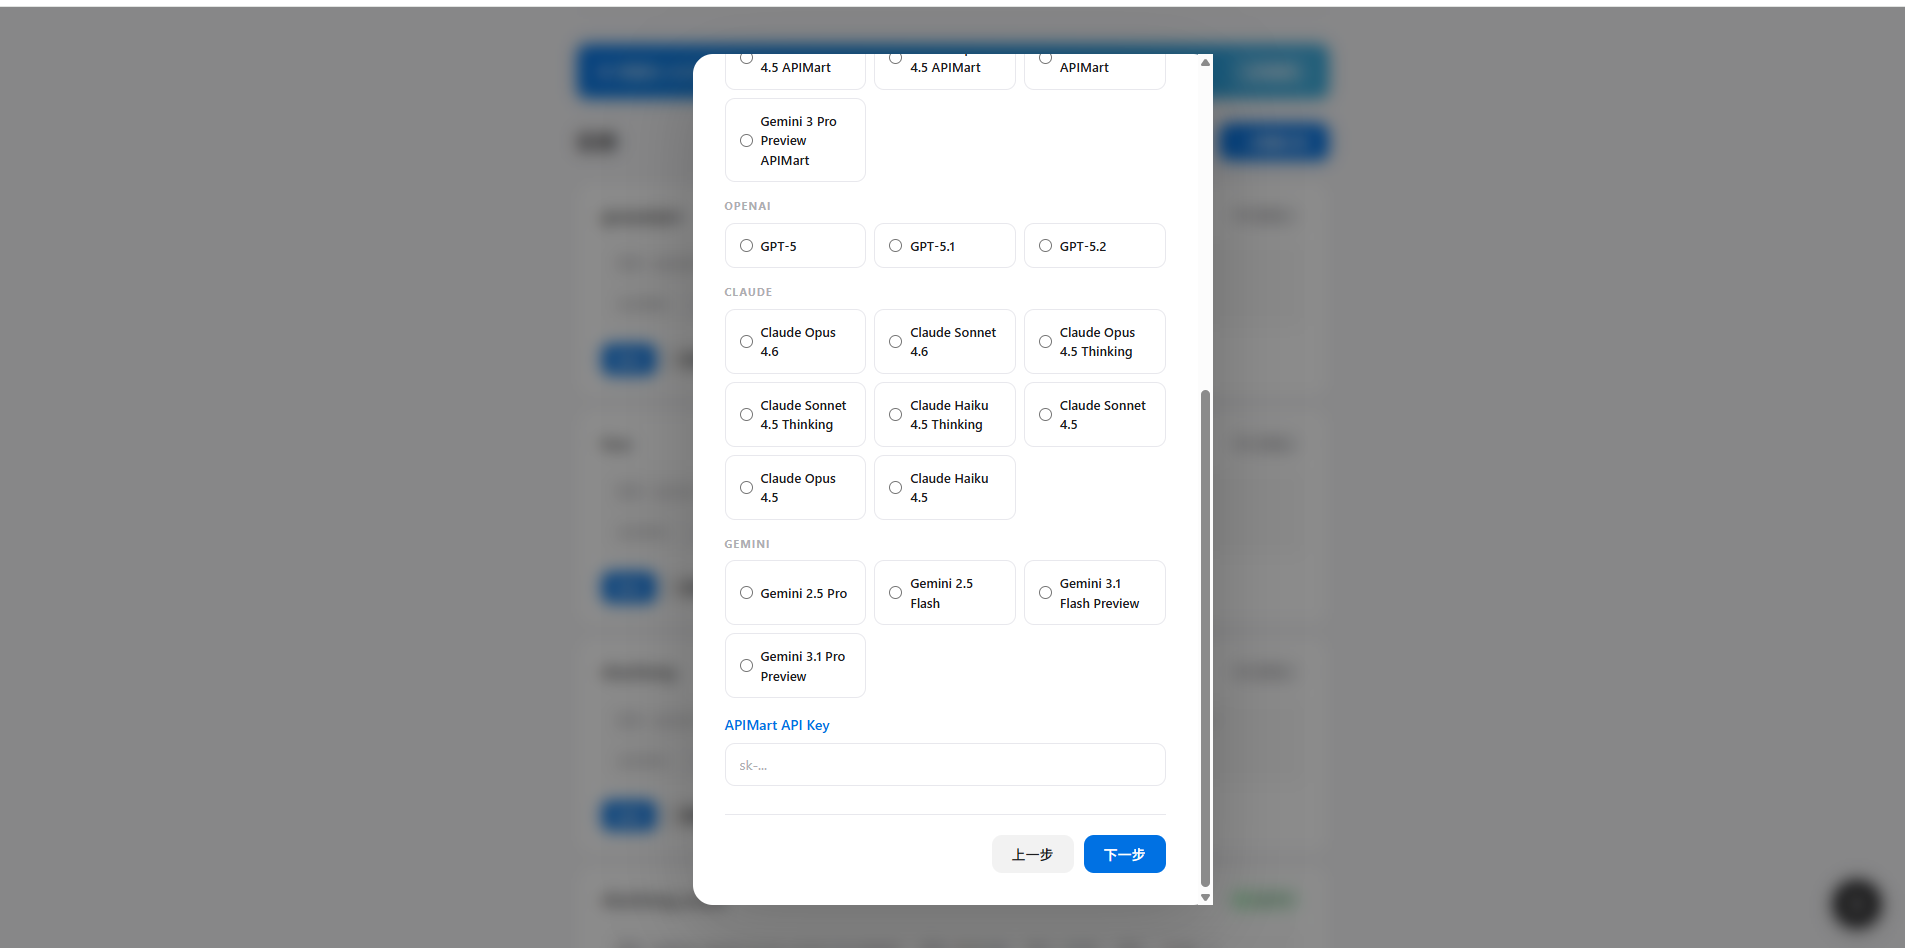
- Select AI model — Choose the model you want to use
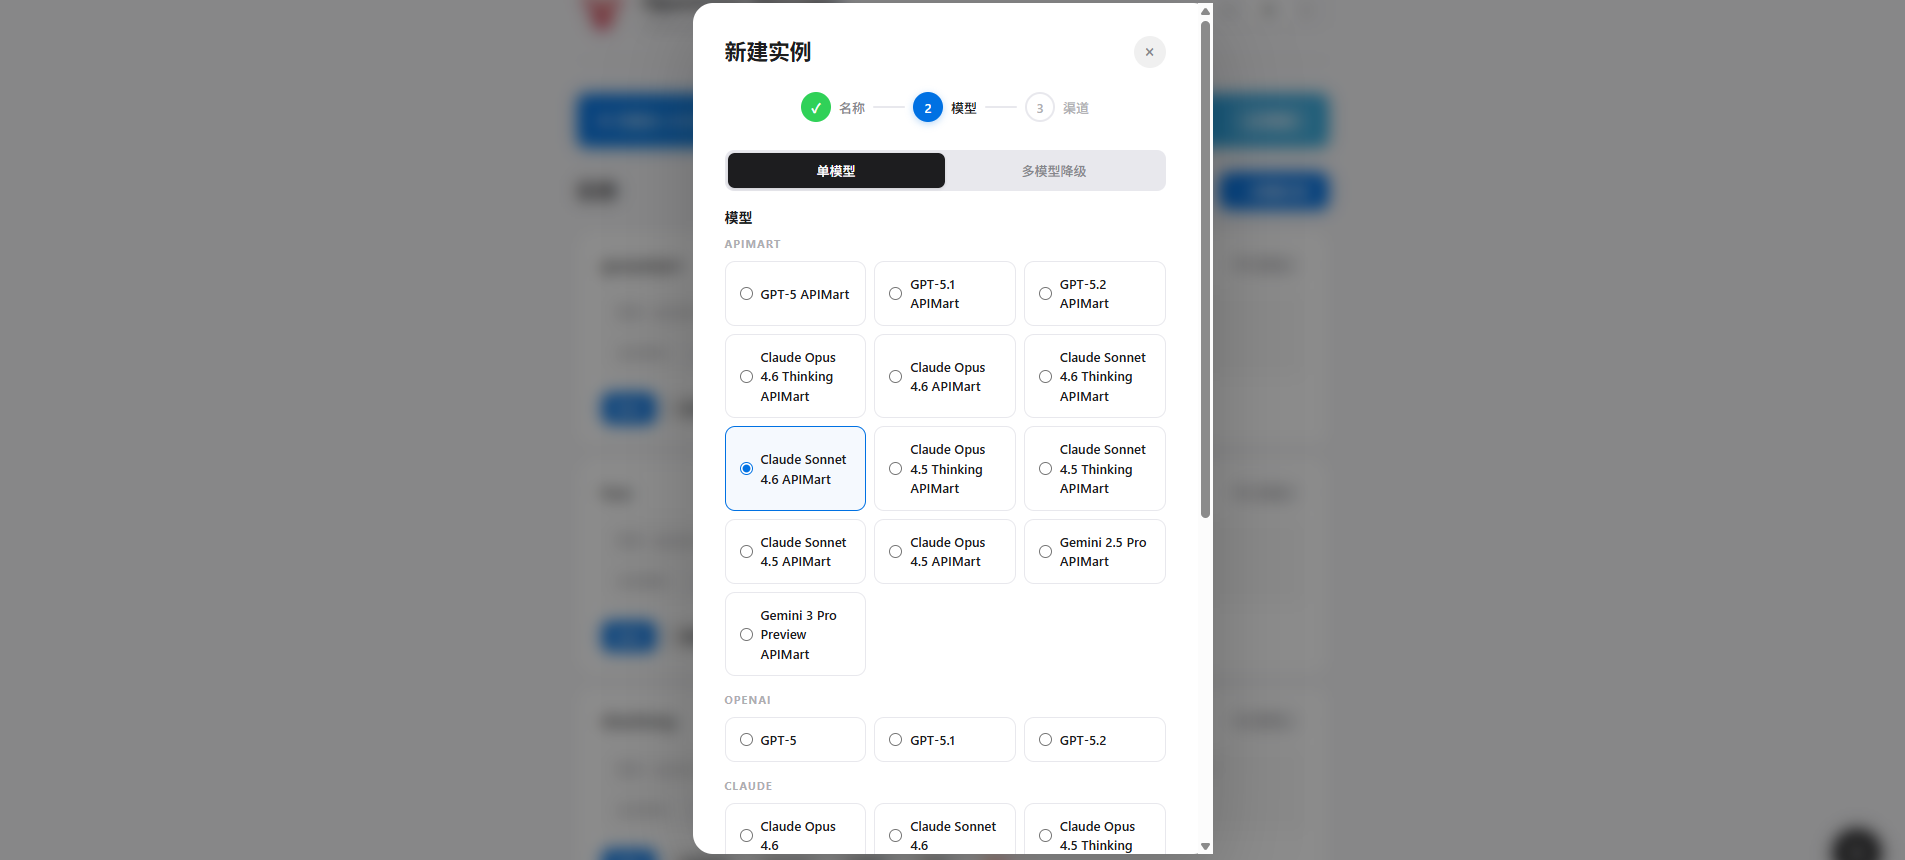
- Enter APIMart API Key — Enter your API key starting with
sk-
- Select channel — Choose Feishu
- Fill in credentials — Paste the App ID and App Secret into the corresponding fields
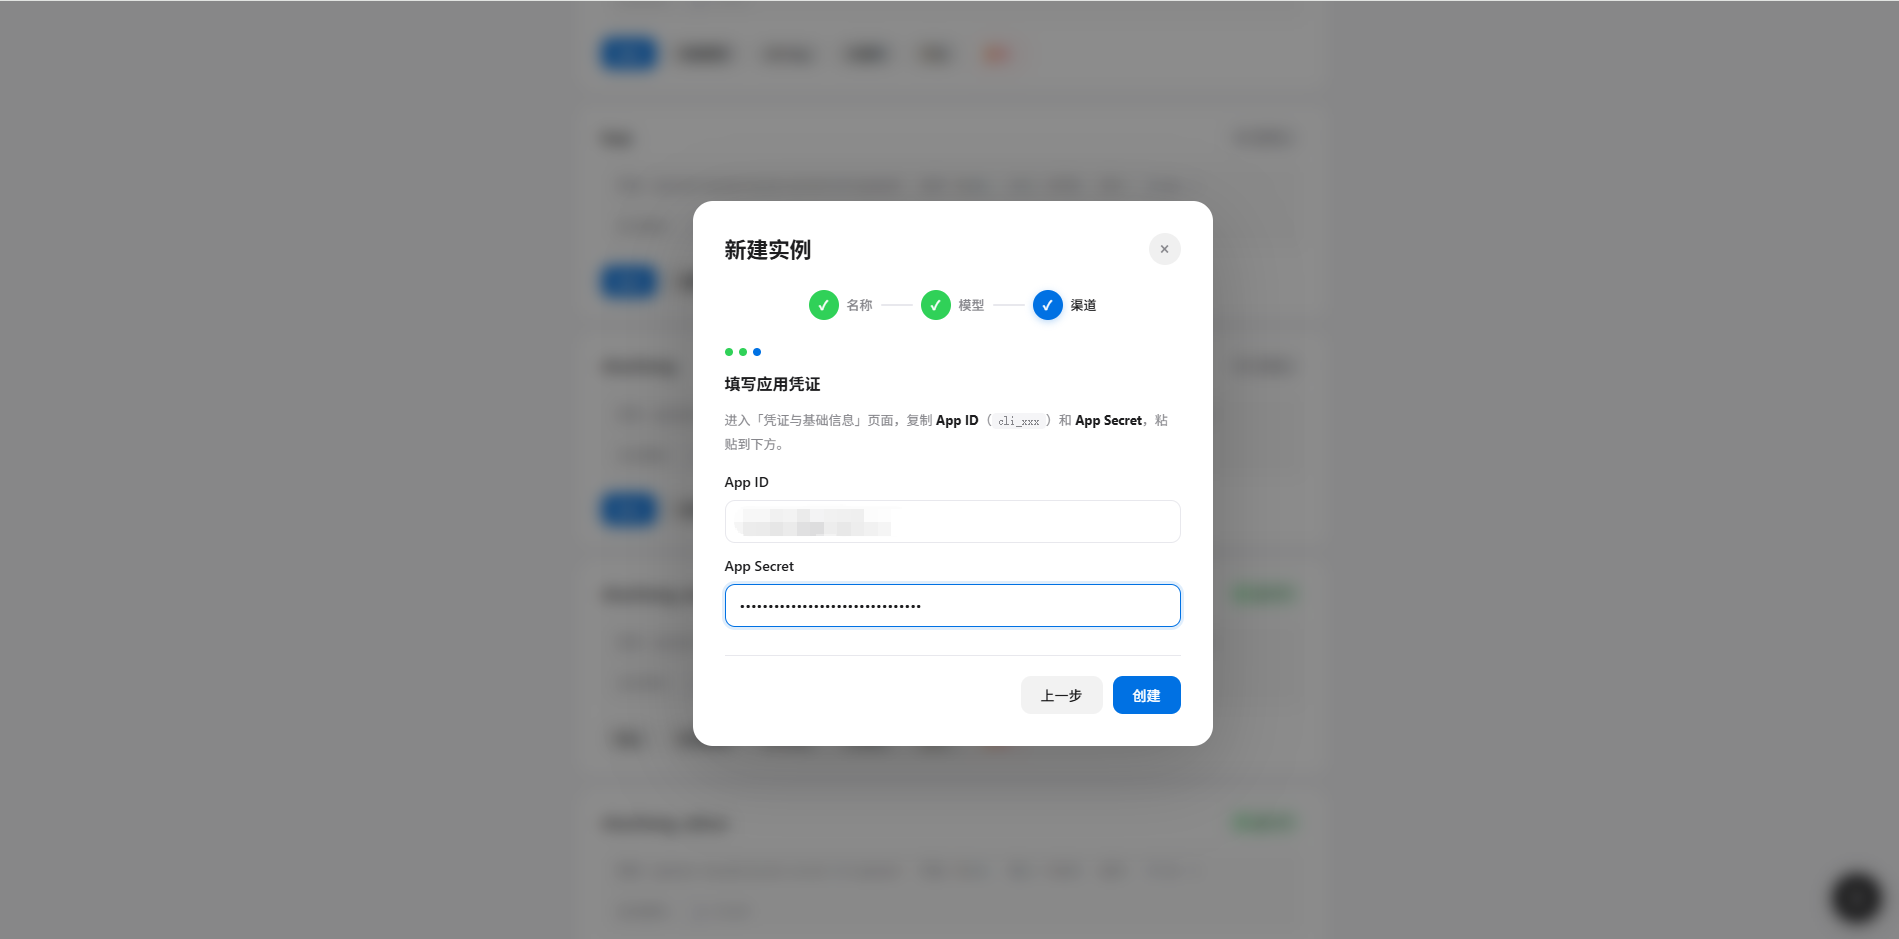
- Click Create to complete instance creation
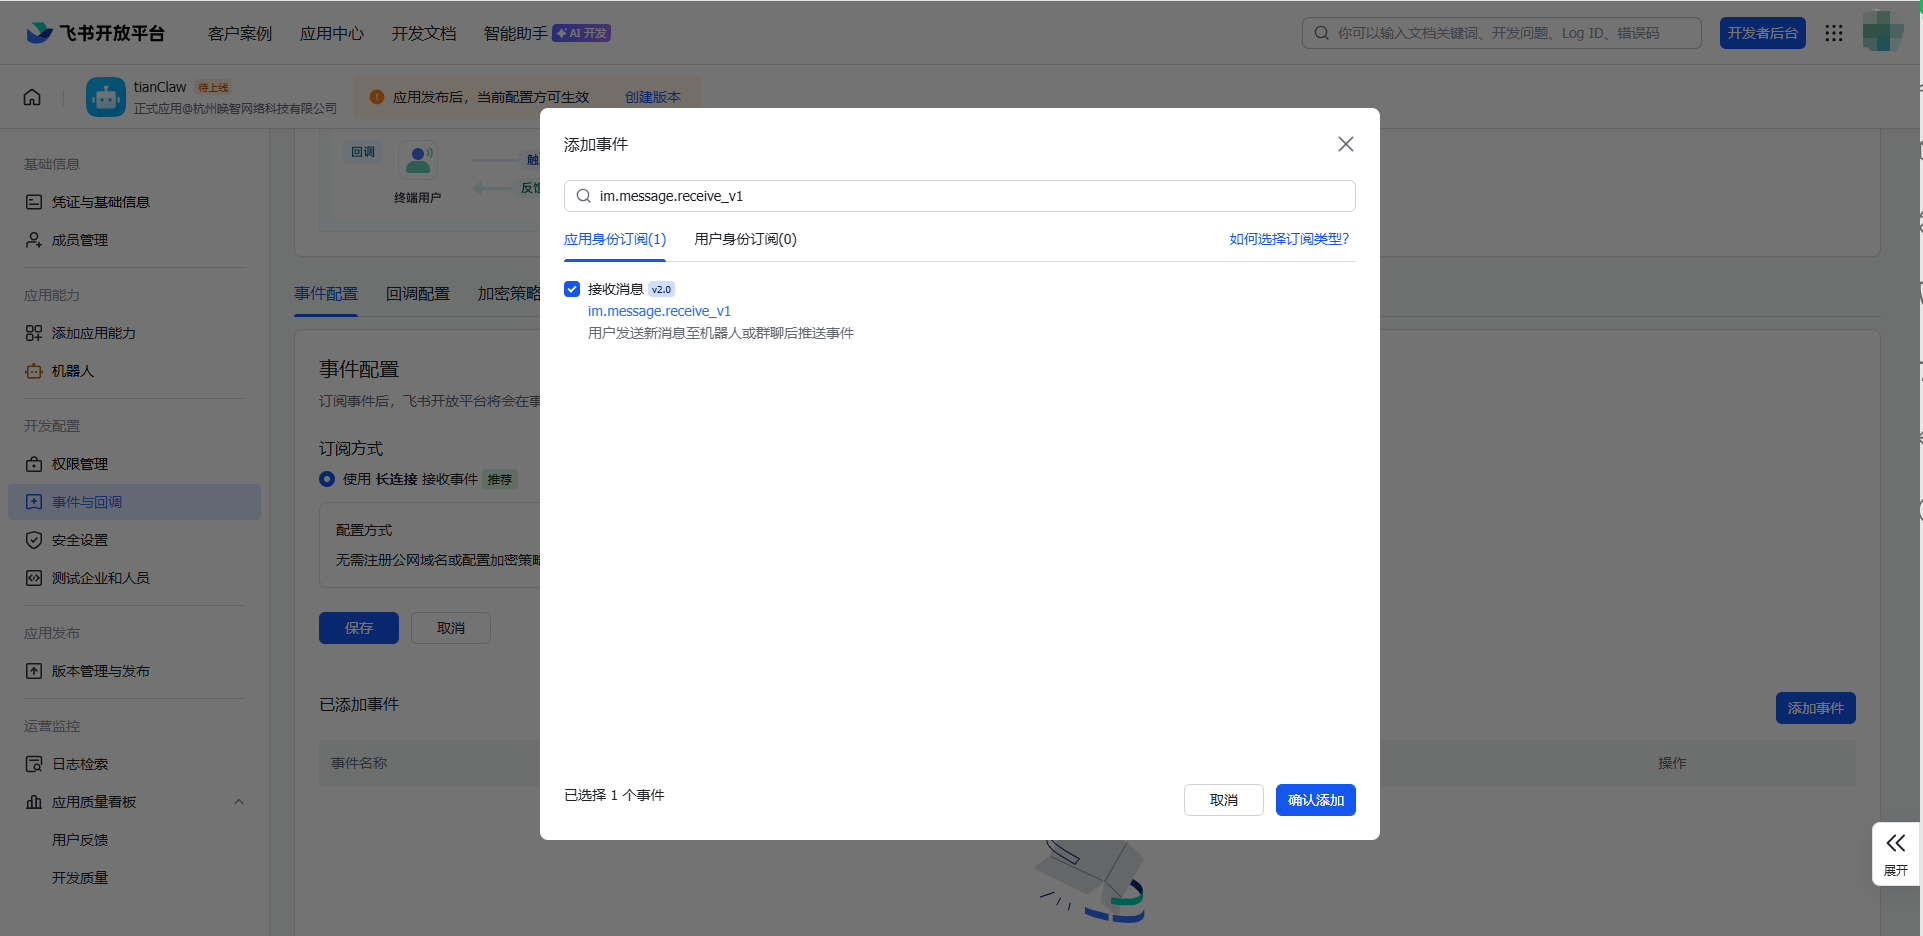
Step 5: Configure Event Subscription
After creating the instance, you still need to configure event subscription on the Feishu Open Platform:- Return to the Feishu Open Platform, enter the app details
- Click Events & Callbacks in the left menu
- Set Subscription Method to “Long Connection”
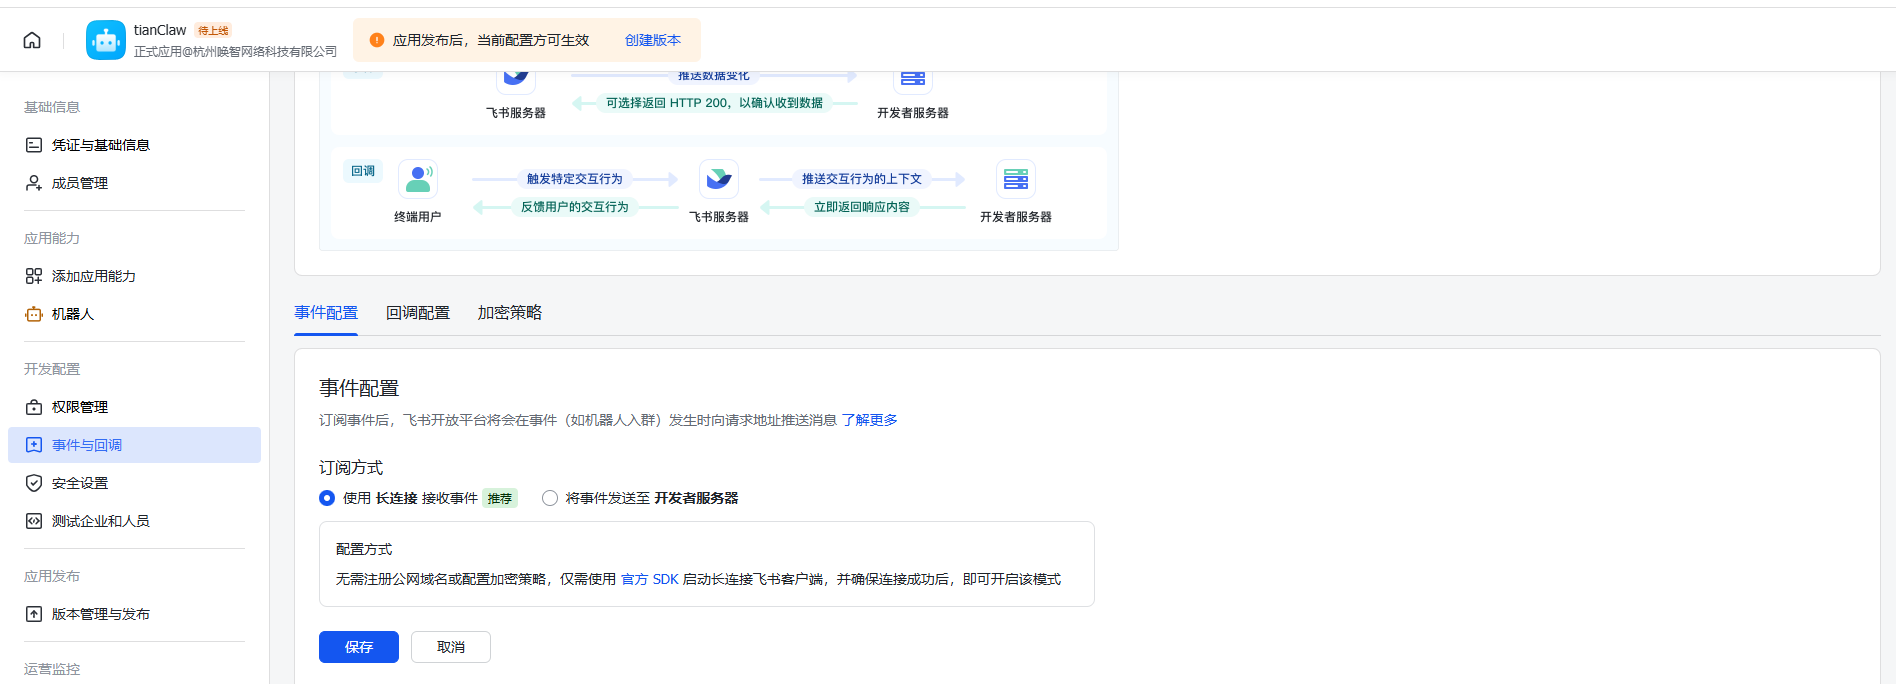
- Click Add Event, search and add
im.message.receive_v1(Receive messages)
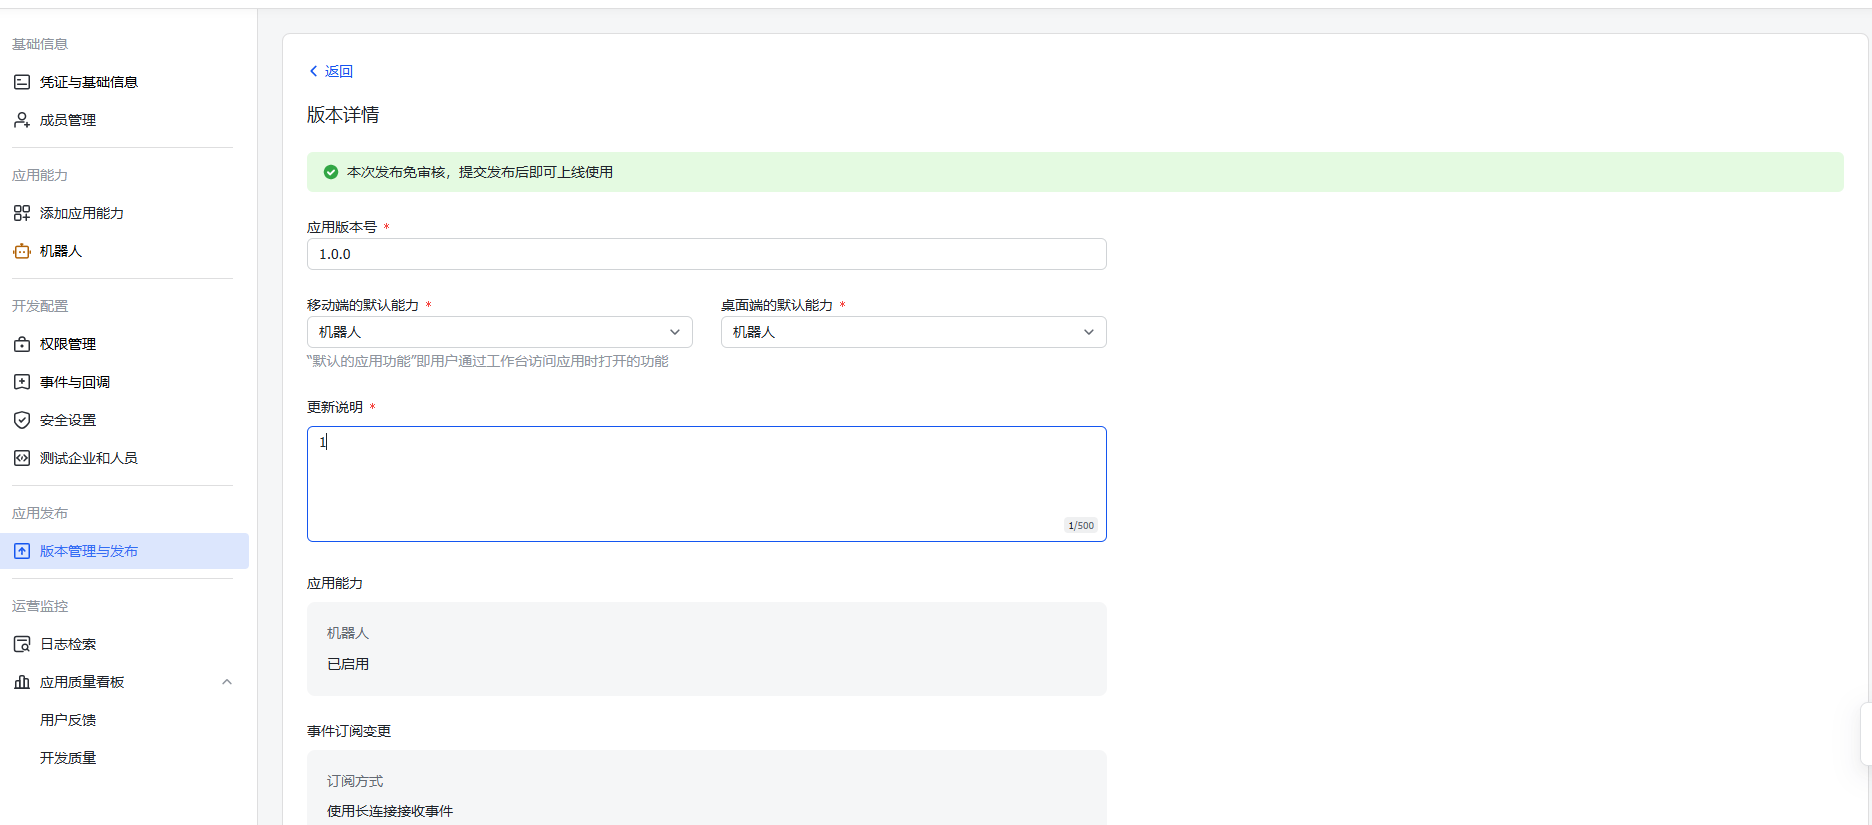
Step 6: Create Version and Publish
- Click Version Management & Release in the left menu
- Click Create Version
- Fill in the version number and update notes
- Submit for review and wait for admin approval
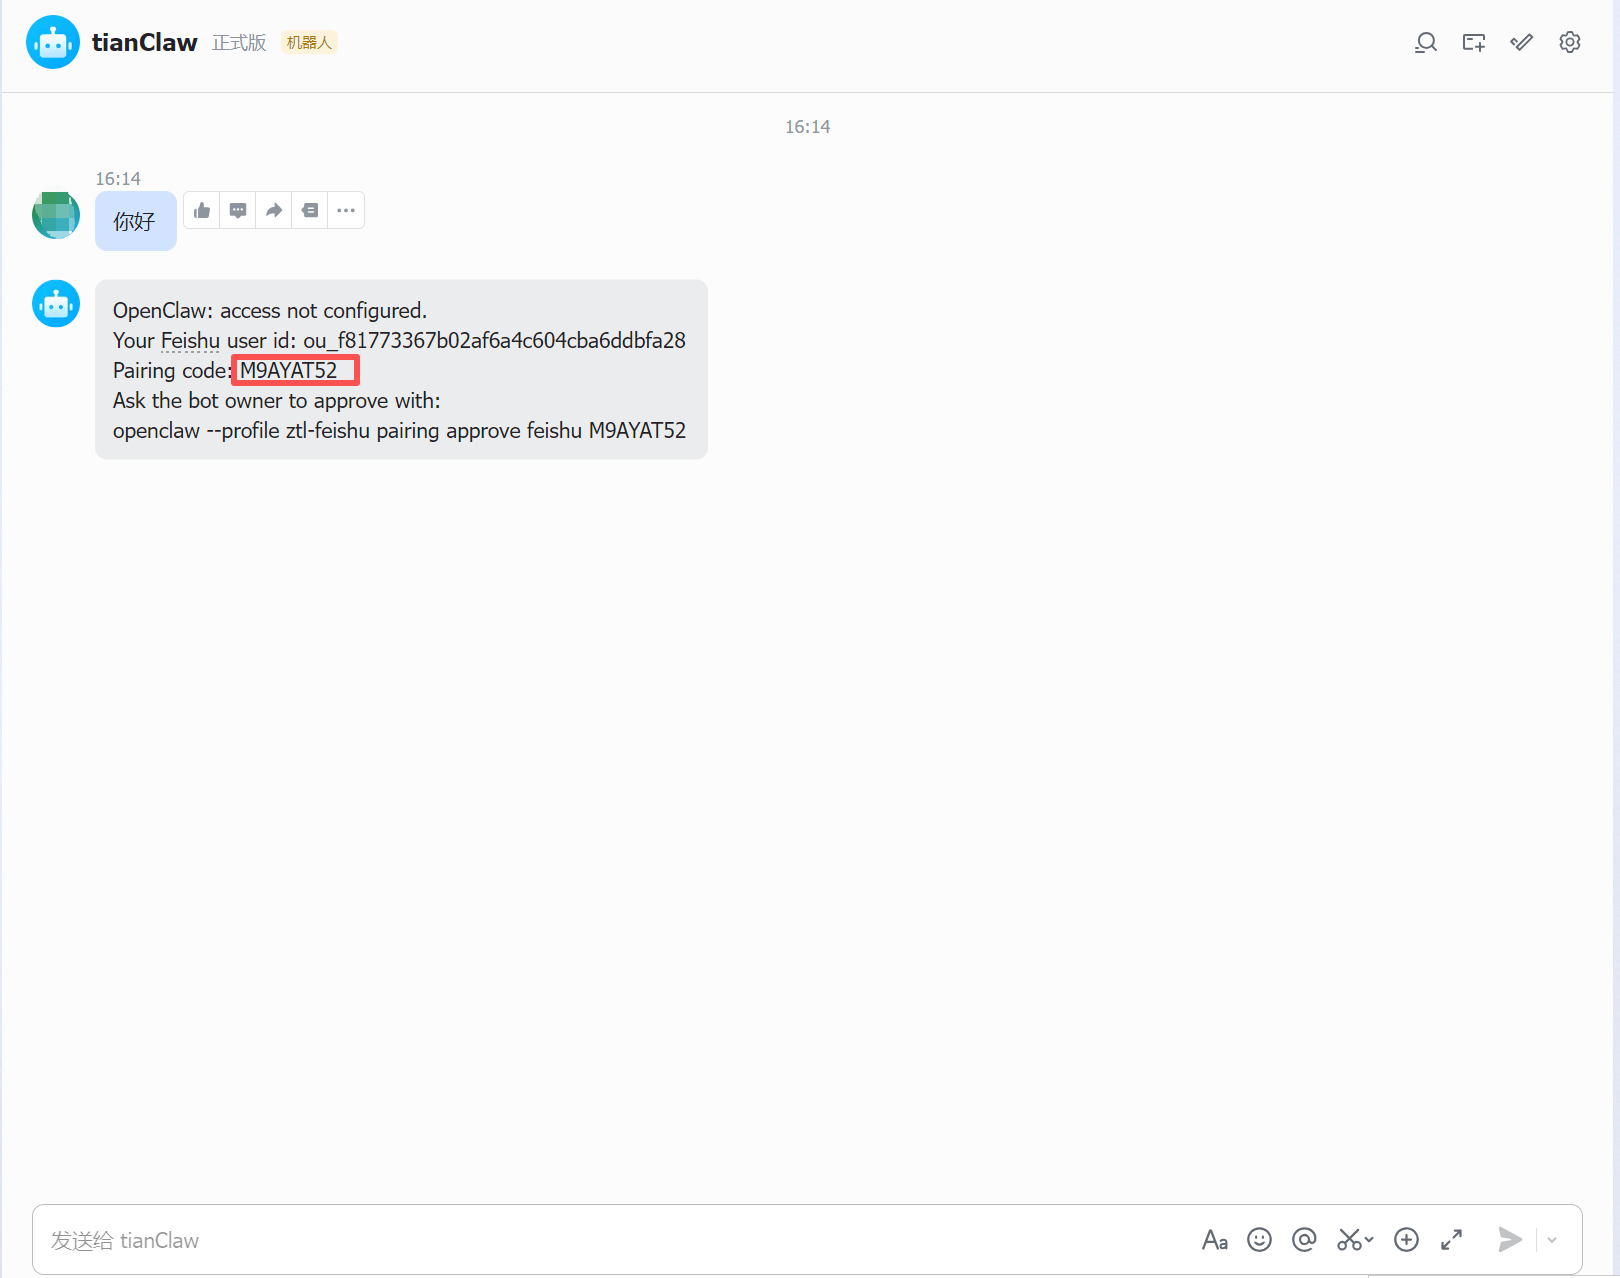
Step 7: Pairing Code Binding
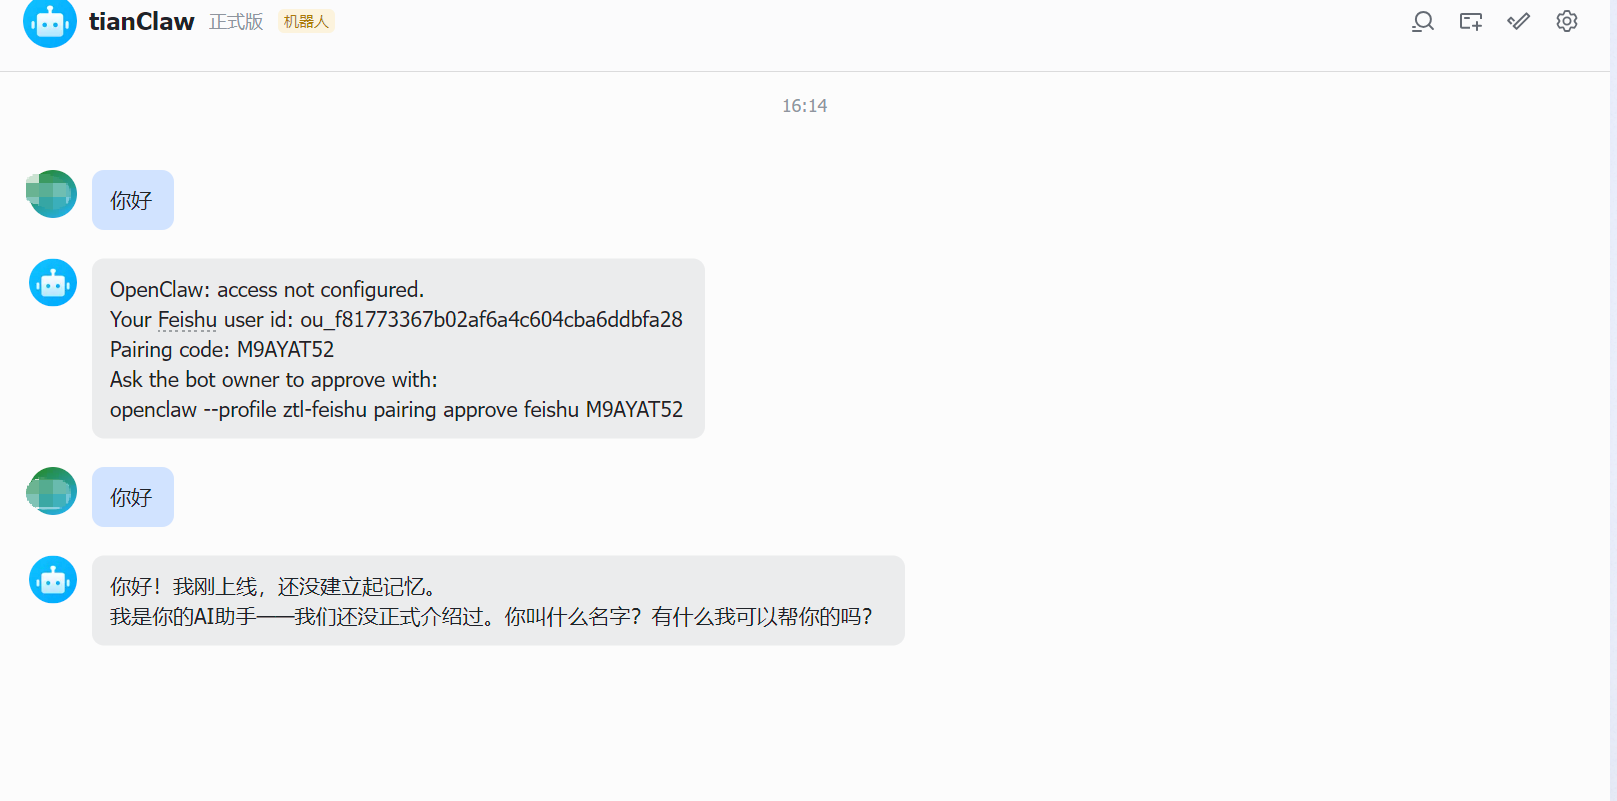
After the app is approved and published:- Search for your bot name in Feishu
- Send any message (e.g. “Hello”)
-
The bot will reply with an 8-digit pairing code (e.g.
DFE62DTD)
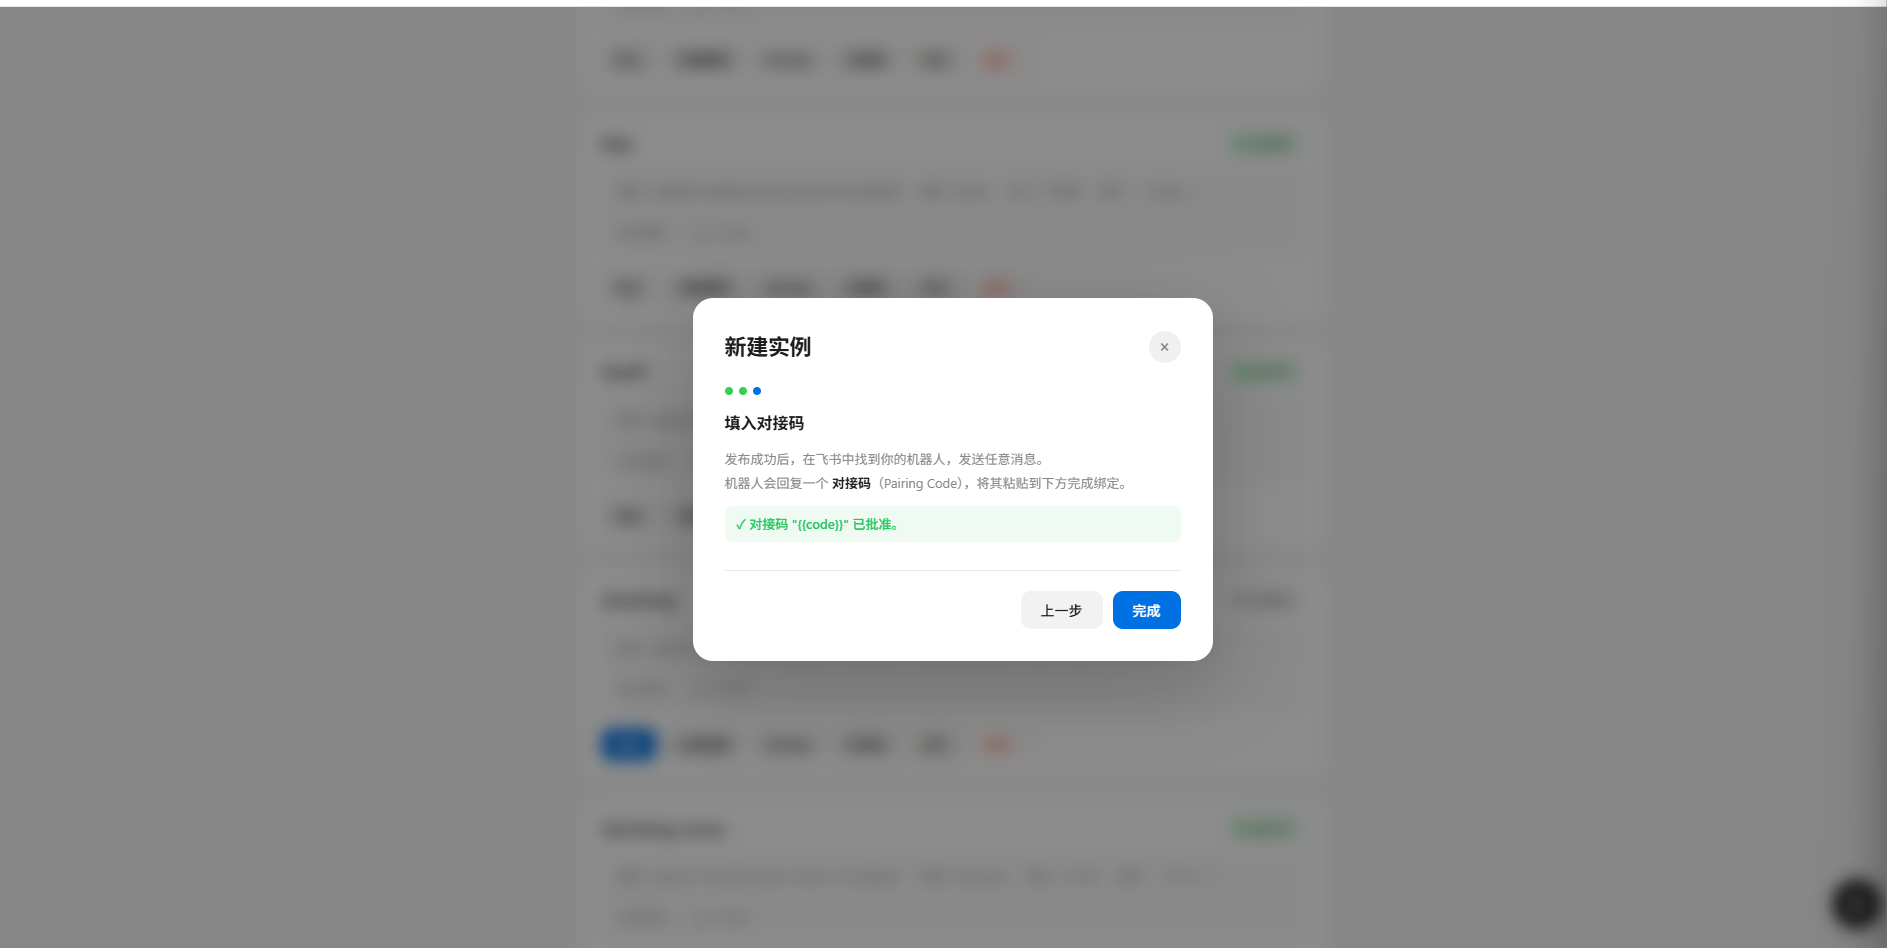
- Return to the Manager’s new instance wizard, enter the pairing code in the “Enter Pairing Code” step and click “Approve”
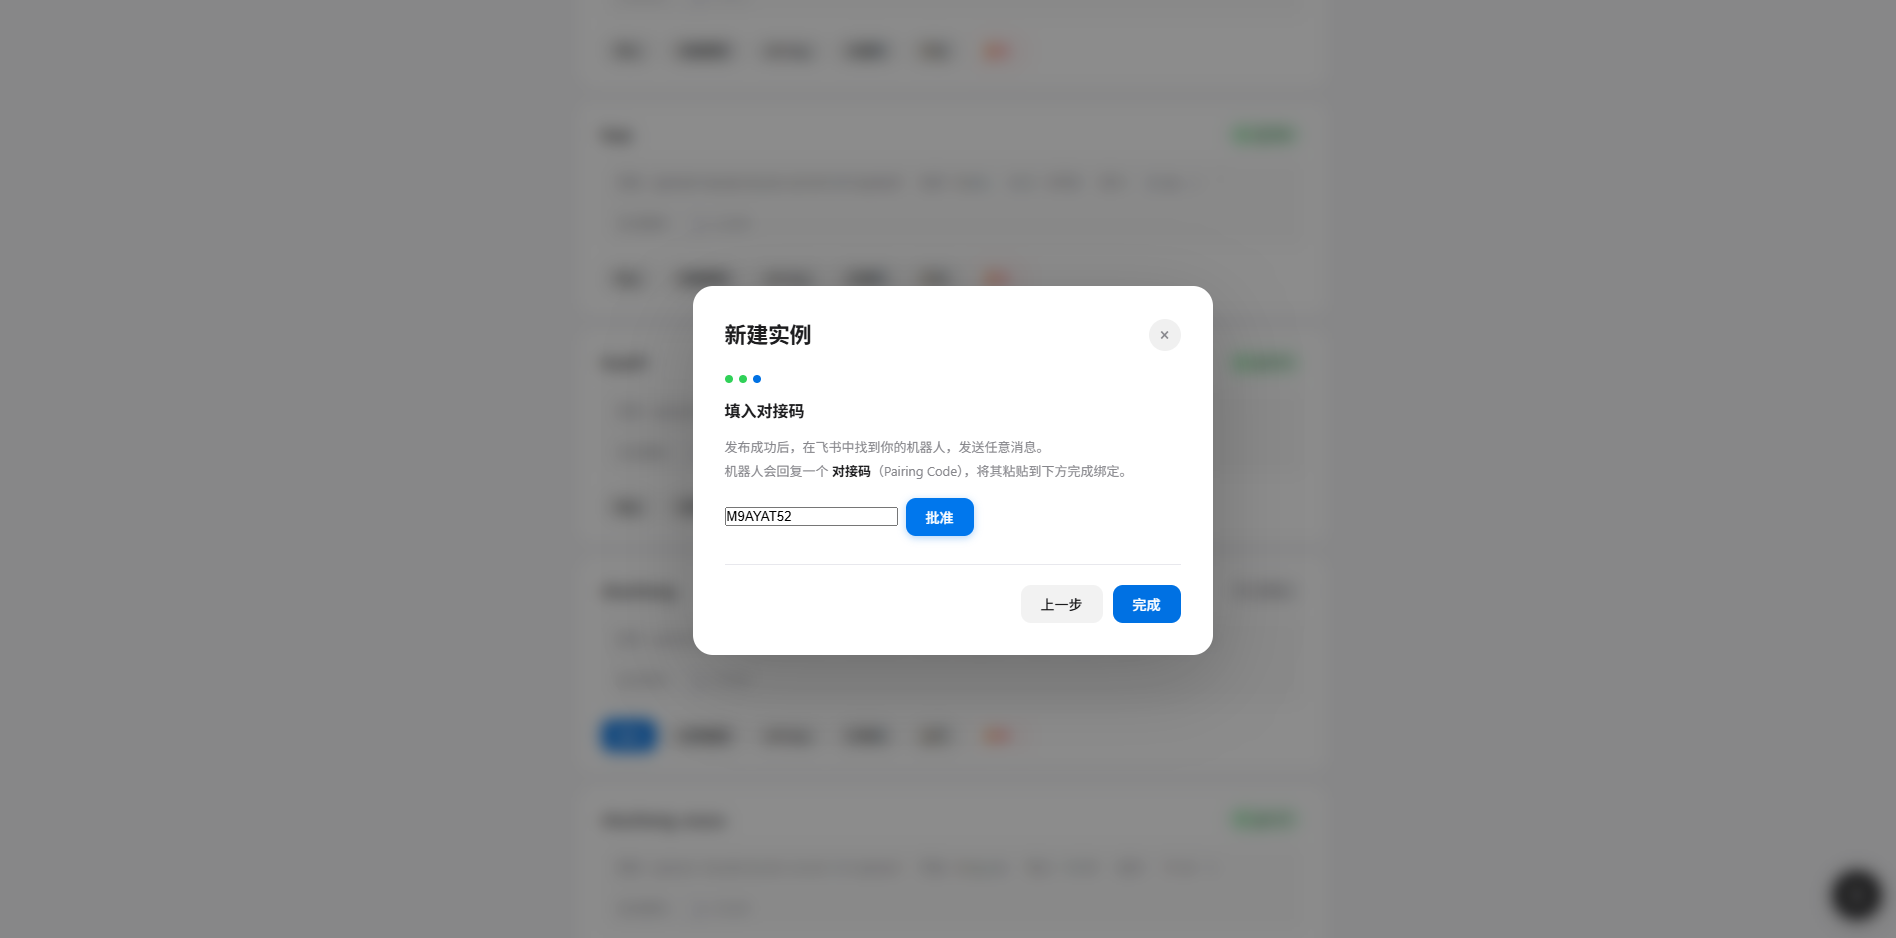
- After the code is approved, click “Done”
- Return to Feishu, send another message, and the bot will respond with AI-generated content
FAQ
Q1: Bot not responding to messages?
Solutions:- Confirm event subscription has added
im.message.receive_v1 - Confirm subscription method is “Long Connection” (not Webhook)
- Confirm a new version has been created and published, and approval has passed
- Confirm the instance status is “Running” in Manager
Q2: Insufficient permissions error?
Solutions:- Check that all permissions are enabled (see Step 2)
- After modifying permissions, you must create a new version and republish
- Wait for admin approval
Q3: Pairing code approval failed?
Solutions:- Confirm Gateway is running
- Pairing codes are case-sensitive, double check carefully
- Codes expire after Gateway restart, have the user send a new message
Back to OpenClaw Manager Deployment Guide
View the complete guide for Manager installation, deployment and instance management